
Picture this: you are developing a fantastic app with plenty of awesome features. Think of it as having an API-facing backend server that stores most of the business logic. After you have your APIs set out, the next most important thing to do is to secure them. You should avoid making your APIs publicly accessible online, unless you are working on an open-source project.
By implementing authentication, you can guarantee that your application’s APIs are only accessible to authorized users. The usage of an access token or a username and password are two methods of user authentication. Here we will examine OAuth2 and access tokens to safeguard your APIs.
What is OAuth2?
Third-party apps may now access your service on users’ behalf thanks to OAuth2, a framework. In contemporary applications, authentication and authorization make extensive use of it. The OAuth2 framework consists of four parts:
Resource Owner
The person is using the application in the end.
Authorization Server
The external application verifies the user’s identity and, following verification, provides an access token.
Client
The user interface determines how a user will interact with your resources. The client might exist in the form of a desktop app, web app, or mobile app. In order for the client to access your APIs, an access token is necessary.
Resource Server
The database contains the restricted files. If authentication is successful, it allows access to the resources after validating the access token.
In order to get an access token, the user must first contact the authorization server via the client. The client can use this token to access the resource server’s protected APIs following a successful authentication process.
The installation of the resource server is the only purpose of this entry.
How Can I Install the Spring Boot Framework?
Go to Spring Initializr to configure your app.
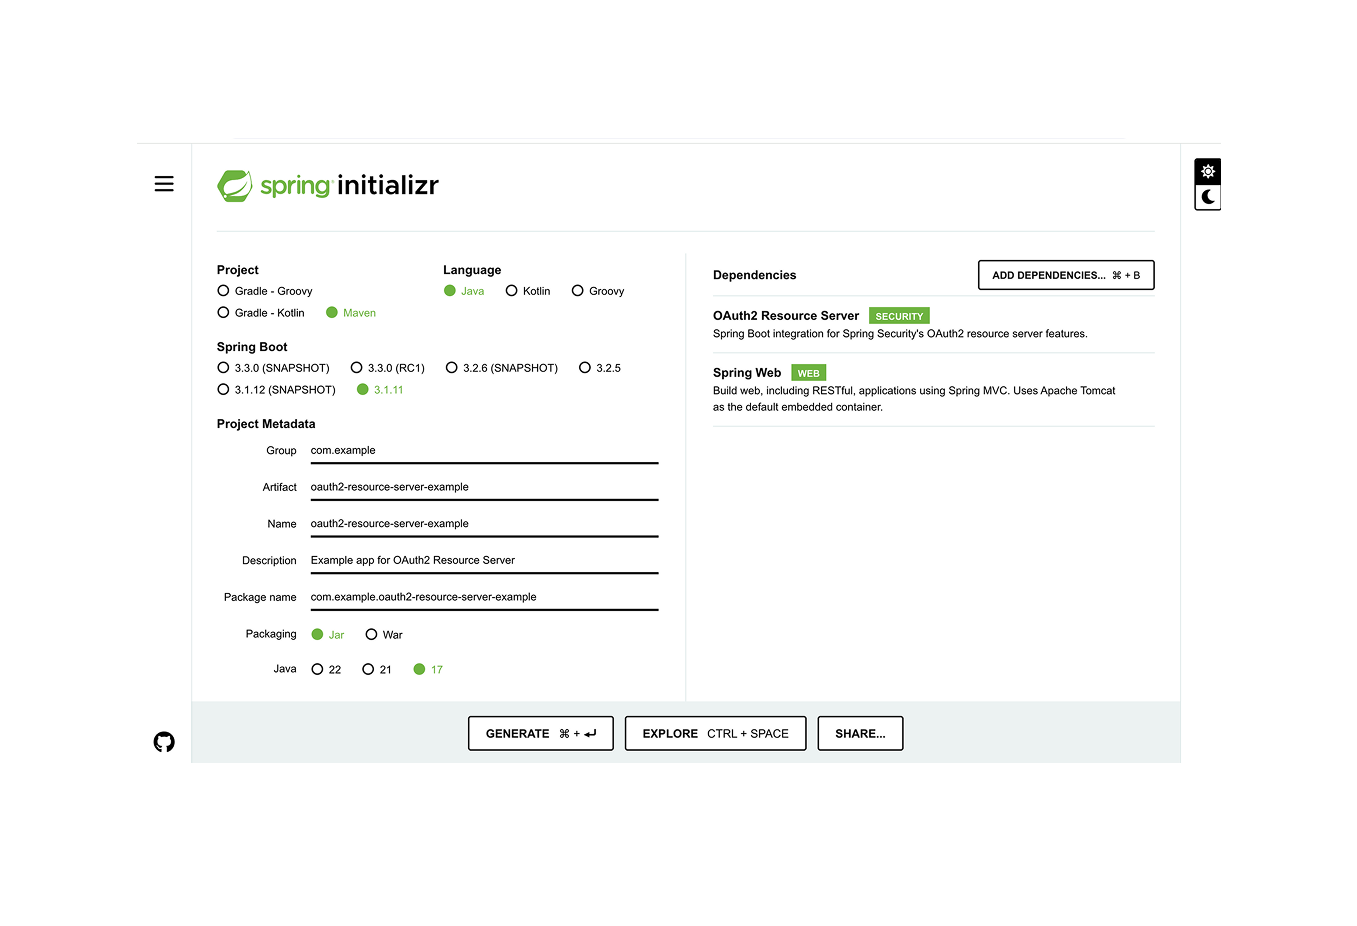
Pick the version of Spring Boot—whether you want to use Gradle or Maven—and give the project a name. Install the oauth2-resource-server and spring-boot-starter-web requirements.
To get the Spring Boot app, all you have to do is click the Generate button and then unzip the zip file. Now that you’ve loaded all of the dependencies, your Spring Boot application should be running. Launch IntelliJ (or your preferred integrated development environment) and choose this project to begin working on.
Web Security Configuration
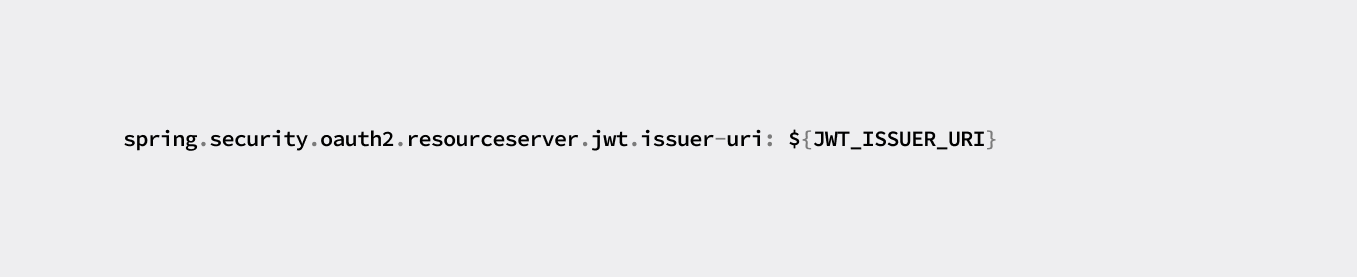
First, open application.properties and add the following property:
spring.security.oauth2.resourceserver.jwt.issuer-uri: ${JWT_ISSUER_URI}
In your OAuth2 service’s OpenID setup, you should be able to locate the issuer URI. Take a look at the Google OAuth2 configuration, for example.
Spring Security configuration is the next step
You must include Spring Security in your dependencies to construct the resource server. Since oauth2-resource-server makes use of Spring Security, we may skip adding it individually.
You may enable authentication for any API you expose in Spring Boot by including Spring Security in your dependencies. Logging in using a username and password is the standard.
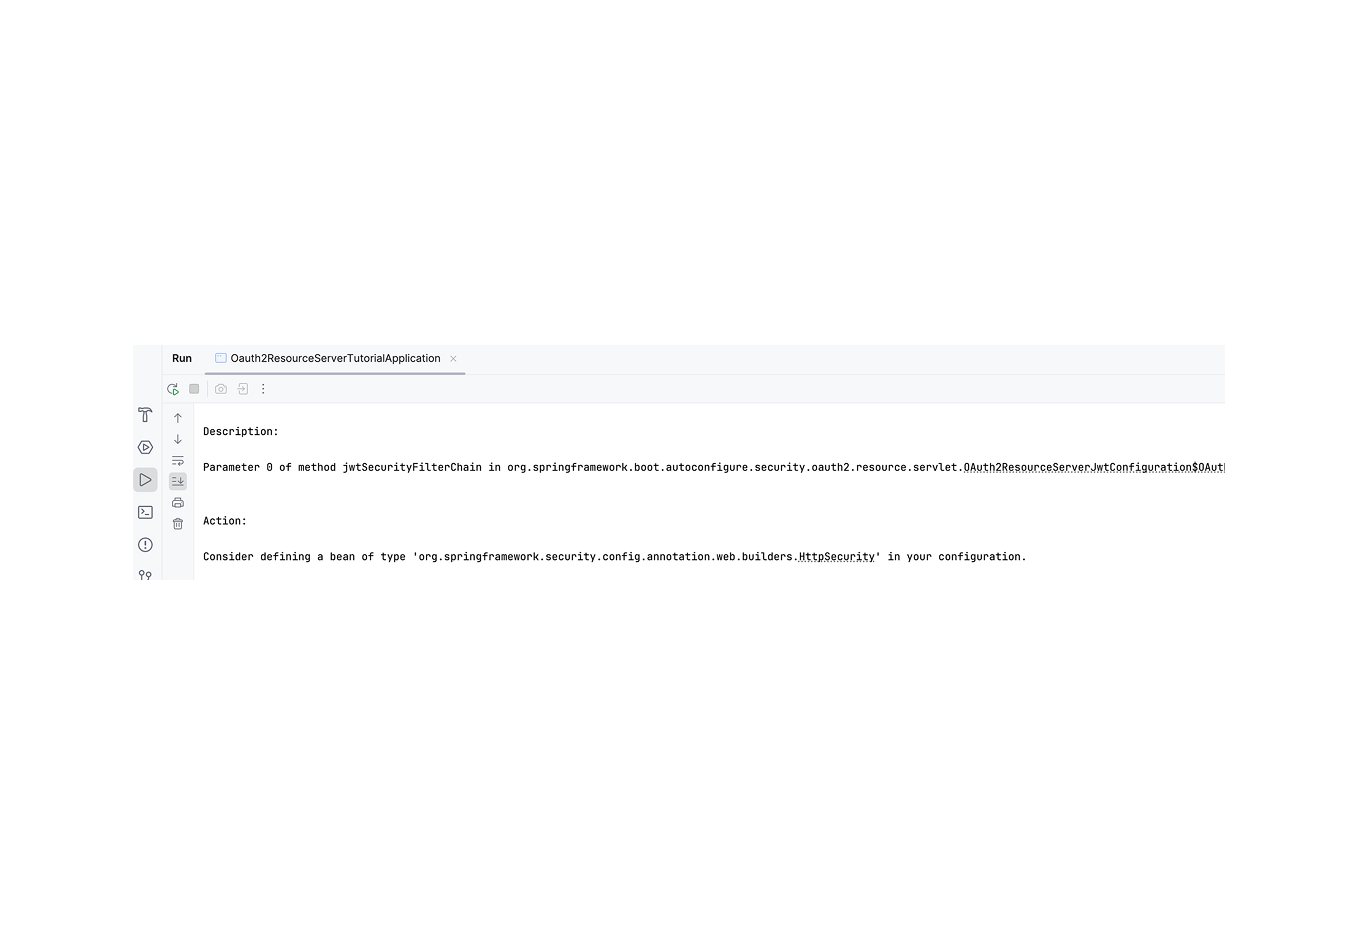
Spring Security’s own SecurityAutoConfiguration class stores the default security settings, which is why this error occurs. Our dependencies do not yet include Spring Security.
We need to stop the autoconfiguration, as we do not want authentication based on usernames and passwords. Go ahead and add the following exclusion to the main class:
Run the programme now, and it will throw an error.
At this point, we can add our configuration. To begin, add the following annotations to a blank Java class named SecurityConfig:
You can tell it’s a configuration class by looking at its @Configuration annotation. Within, you’ll find many bean methods that actually create beans. To put it simply, beans are the things that make up a Spring Boot application. By using @EnableWebSecurity, you may instruct Spring Boot to use your settings to enable Web Security.
Design a procedure that takes a type parameter and returns a type bean.The implementation of a security filter chain By implementing bespoke filters, the security filter chain bean is able to intercept and process incoming requests. You may apply several types of permission to distinct requests here.
Let’s break down this code into its essential components
- You may provide an HttpSecurity object into the filterChain() function. You may configure requests using this Spring Security class.
- We have expressed the object as a lambda expression, and the function authorizeHttpRequests() accepts it.
- We have matched a route that will be available without authentication using the requestMatchers() function. Any path that begins with /public will be open to everyone in our situation. For all other routes, authentication is required.
- To make our app an OAuth2 resource server, we use the oauth2ResourceServer() function. In this section, we outline the default customizations that will utilize JWT authentication.
- The last step is for the http.build() method to construct and return the HttpSecurity object.
- The aforementioned configuration of web security is part of this project. However, a different setup could be necessary for your specific needs. For instance, you may define the routes that each privileged role, such as admin, can access in your application.
- For further information on how to modify web security, refer to the documentation for the JWT resource server.
Make use of the Controller Class to write APIs.
We may start by creating two basic application programming interfaces. Make a MainController class and make these APIs available:
According to the @RestController annotation, this class is responsible for processing HTTP requests and sending back data to the client, usually in JSON format. The team has developed both a public and a private API.
Finish by saving the file and running the application.
Testing the APIs
Without an authorization header, let’s use Postman to test the aforementioned APIs.
In the two API requests mentioned earlier, the /public route successfully delivered a response; however, the /private route failed and returned an error with a status of 401. Not authorized. This is due to the fact that we have enabled unauthenticated access to all routes in our setup. Authentication is required for all other routes. To access the private route, we need a bearer token.
Let’s make sure the request for the private endpoint includes an authorization header.
We may get a response from the private route if we provide an authorization header along with the access token. We must provide an access token in the header for this route and any others that do not begin with /public.
Getting the User’s Details From the Access Token
The security filter watches all requests made to private routes for a bearer token. Assuming a token is present, it retrieves the authentication details by deciphering the token. Reading the documentation for the OAuth2 Resource Server will give you a thorough understanding of this procedure.
We set the authentication data on the SecurityContextHolder class if the token is valid and authentication is successful. You may get the authorized user’s information in the SecurityContextHolder. It is from this class that we retrieve the user’s details, including their name, email, and more.
We need to figure out how to acquire this user data. The SecurityContextHolder is where we initially get an Authentication object:
Then we get an object using the getPrincipal() method:
The previous item may be type-cast into a JWT object since we are utilizing JWT authentication. The object has the following properties:
From the claims field, we can get the user data:
In order to get the user’s information, we may utilize the matching key value in the aforementioned map. CurrentAuthContext is a distinct class where we may write this logic:
To gather the information you need, you might include additional methods. Call CurrentAuthContext.getUserEmail() or any method that returns the value you need to get the user’s email address from anywhere in the application.
Conclusion
To ensure that only authorized users may access your APIs, OAuth2 offers a solid foundation. First, we covered what OAuth2 is and how it works in this article.
The Spring OAuth2 Resource Server relies on Spring Security. Based on our needs, we figured out how to deploy security setups. We proceeded to create both public and secret APIs, and we put them through their paces with and without access tokens.
Tokens sent in the authorization header are the sole way to access secret APIs. Using the SecurityContextHolder class, we additionally added code to get the user’s details from the access token. Visit our blog for similar posts.